How to create an AdSense account?
The popularity of Google AdSense is evolving gradually. People are using it to earn money so that they can lead a healthy and robust life.
What is Google AdSense?
 AdSense is an advertising placement which is run by Google. This program is designed for the website owners who want to display targeted text, video or image advertisements on their website pages and can earn money when a customer will visit the site and click the ads.
Though there are many AdSense alternatives available, still this is the best and most applauded by the users.
The criteria that you need for applying an AdSense account are
- You must have a website
- You must be above 18 years old; otherwise, you can use your parents or guardian information if they permit you to do that.
Steps to create an AdSense account
- At first, you need to do sign-up for AdSense
- Add AdSense ads to your blog
- Wait until your account is reviewed and either accepted or rejected.
A step by step guide to creating an AdSense account
- At first, you need to go to the sign-up page for AdSense. There, you will see an option to create a new Google account, or you can choose your existing Google account for AdSense to sign up.
- Then, you will see the AdSense form where you need to enter your website address and select the content language. For the website URL, use your blog address, and you must add it without “http://.”
- Now, submit your AdSense application. Fill all the details correctly. The “payee name” is essential. You must use the same name under which you have a bank account so that AdSense will send you checks or EFT payment under that name. If you made any mistake, then changing the payee name of your account will be difficult in many countries.
- Now, add your contact information and other details.
- Read the AdSense policies and put a tick mark in all three boxes.
- Now, you can click on “Submit,” and on the next page, you can review your details.
You can use an existing Gmail address for signing up, or you can create a new Gmail account just for AdSense.
Once you registered, you need to add AdSense codes to your blog or site. The AdSense team will review your application after you have added the codes. Your account will be activated once an Adsense Pin will be sent to you. The entire process takes approximately 1-2 months depending on your geographical location.
If you want to get paid from AdSense, you need to complete two further steps:
- Submit your tax information
- Enter your pin
AdSense Pin
You will receive an AdSense Pin by mail from the AdSense team once you reach the threshold of $10. You need to add the pin to your AdSense account. You will start receiving payment once your AdSense account reaches the $100 limit.
This information will help you to create an AdSense account successfully.
How to build a micro niche site if you want to earn $174 per month from AdSense?
These days, the internet is thronged with many opportunities which will help you to earn money comfortably. Blogging is one of the easiest and smartest ways to make money. If you want to earn money in a quick period, then you must go for a micro niche blog.
What is micro niche blog?
A micro niche blog is one where you create a high-quality website for any topic. A niche website always gets a higher rank in Search Engine result pages than a non-targeted site. Once you have created your niche site, the next step is to wait for the money to be deposited into your account.
How to create a niche website? Let’s discuss it in a step-by-step way.
1. Select niche and domain:
At first, you need to find a niche that you are comfortable. Since your prime goal is to make money from the blog using AdSense, it is very imperative to choose a topic which is famous in countries such as U.S., U.K., Australia, Canada and that has high commercial value (high CPC). The next step is to choose a right domain name. Since it’s a micro-niche site, you must try to include keywords in the domain name.
2. Keyword research and content planning:
Now, you need to find out proper keywords. You may use SEMrush to find out suitable keywords. SEMrush will help you to find out those keywords that generate more AdSense revenue. For content planning, always choose the topic which is high in demand.
3. Setting up the micro niche blog:
You need specific tools which will help you to create and set up the blog. You need hosting tools like Bluehost and theme tools like Genesis for plug and play. Your goal is to get more search engine traffic so that you can get more money from AdSense.
4. Create a separate social media page:
The benefits of social media are unfathomable. It will be a prudent decision for you if you add social media profiles to your site by using social media automation.
5. Building backlinks and promotion:
Since there is a steep competition, hence by generating high-quality backlinks you can enhance the rank of your site. You can take help from Shoutmeloud which will help you to find a chunk of backlinks for your website.
6. Monetization:
Apart from AdSense, you can one affiliated product related to your site’s niche which will help you to get an extra income in every month.
So, by investing a small amount, you can earn nearly $174 per month. You don’t need to work day and night to earn money, by spending a few hours every day, you can earn a good amount of money from AdSense.
How not to get your AdSense Account banned?

Though there is a chunk of AdSense alternatives, still AdSense is the best. Getting approval for AdSense account is not a final step, keeping your Adsense account active is a big task.
You need to understand AdSense TOS and Stop violating AdSense policies.
Here, we are mentioning some tips that you should avoid so that your account will not get banned.
1. Invalid click:
Invalid clicks are the main thing from where most of the AdSense account gets banned from the team. Usually, AdSense publishers ask their friends to click on Ads or click on their Ads from different I.P. If the AdSense team detects this kind of activity, then they will disable your account to ensure and safeguard their advertisers.
2. Using AdSense on unsupported language blog:
Google doesn’t encourage or support all the languages to qualify for AdSense program. If you have an AdSense account and you are using to show it on the blog whose language doesn’t qualify AdSense TOS, then change it immediately.
3. Send ads on email:
Sometimes, publishers used to send AdSense adverts within the Gmail, and it goes viral. Google considers this kind of action against the program policies.
4. Advertisement level:
Many publishers often use a trick like “Click here” if you want to see more. If you use a pop-up script to show AdSense in a pop-up and your readers will need to click on it to read the content, then this is a big no for you. This kind of pop-ups can ban your AdSense account.
5. Competitive contextual advertisement:
You should try to avoid the use of any other contextual advertising program. For monetization, you can use other ad networks, but they should comply with AdSense TOS.
6. Altering the AdSense code:
You can’t alter your AdSense code. Changing your AdSense code in any condition will not be permitted by Google. If you want to place Google AdSense image ad unit with the adjacent image, then you can do it, but Google AdSense might ban you. As Google AdSense TOS will not give you the permission for this activity.
7. Hosting Copyright content:
If you are running AdSense on a website which distributes copyright content like movies, songs or any other files, then your account will be banned instantly.
8. Linking to sites which distribute illegal and copyright content:
If you are linking your site with other sites which contain illegal content, pirated software or keygen sites, then your AdSense serving might be disabled for that particular site. You should avoid certain types of content like Porn or adult material, gambling, racial content, violent content, pages selling drugs or alcohol, pages selling weapons, etc. so that your account will not get banned from the AdSense team.
9. Paid traffic:
 If you are buying traffic for you AdSense enabled site; then your account will be banned because AdSense TOS does not permit it. You can promote your content or post on social media channels or buy traffic from the sites like Facebook, Reddit, Stumbleupon, etc. these kinds of traffic will not be considered as a violation.
10. Don’t make ads sticky:
Don’t make your AdSense ad sticky because sticky ads are against AdSense policy.
If you are already a victim of AdSense ban game, then this is the high time that you need to know what are the things that you should avoid so that your other AdSense enabled accounts will not get banned from the team.
Google Auto Ads:
From February 21, 2018, the AdSense team has launched Auto ads for everyone. This is one of the most significant achievements of the AdSense team.
What is auto ads?
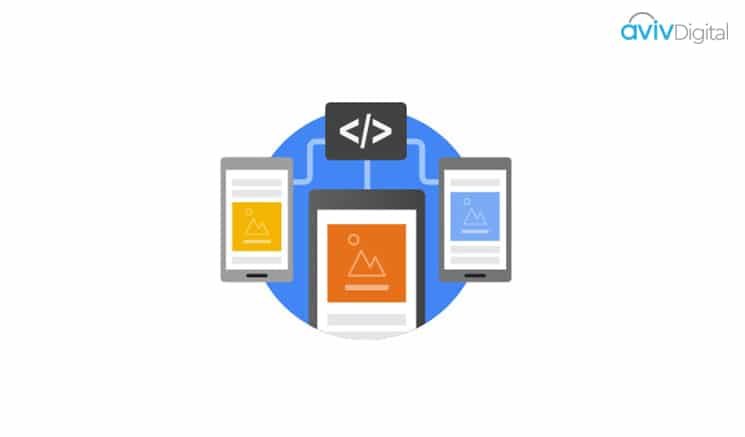 One of the prime concerns of most of the AdSense publisher is the ad placement, ad optimization, and maintain good user experience. Google auto ads are using artificial intelligence and thus, automatically manage ad placements and optimization for the publishers. As a publisher, you can still achieve Global settings, Domain-based settings, and directory settings.
The person who is already using Google AdSense can efficiently use Auto-ads. Certain things you need to know before using Auto-ads.
- If you have already placed AdSense ads on your blog, you can decide not to remove those ads. AdSense auto ads will automatically detect those ads and put more ads accordingly.
- Auto ads include Anchor, Vignette ads and many more additional formats such as Text and display, in-feed, and matched content ads. So, users who are using page level ads will automatically migrate to auto ads without adding code to their page.
How to enable Google AdSense Auto ads?
Here, we are mentioning a complete guide list how to enable auto ads.
- At first, login to your Google AdSense account.
- Then, go to my ads> auto ads
- Now, click on “set up auto ads.”
- Configure your global settings
- Enabling automatically and get new formats at the bottom of the page.
- Click on save
- Now, you need to place ad codes on every page of your blog or website. If you are using page level ads, you don’t need to do anything.
- You can check the performance of Google Auto ads any time by going to My Ads> Auto ads and clicking on the statistics report.
At present, Google auto ads are in a nascent stage, and people are giving mixed views regarding this. Only the future can tell us whether this will work as per the expectations of the people or it will be another disappointing endeavor.
Aviv Digital is one of the leading digital marketing training institute in Kerala. We offer a wide variety of globally recognized certification programs which includes SEO, SEM, SMM, Email Marketing and Inbound Marketing courses.
Want to know more about the course? Contact us at: +91 9037 489 577


